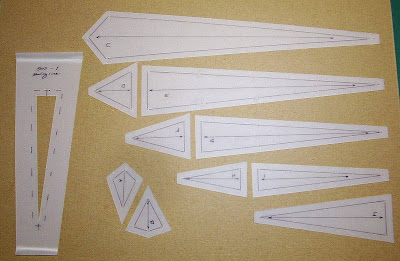
Here are the plastic templates I made from the EQ template printout. (You can click on the photo to enlarge it. Then use the browser's Back button to return here.) I just traced over the pattern then cut out the templates using a pointed Xacto knife and metal ruler. I punched holes with a 1/16" hole punch where I want to mark dots on my fabric for matching up the ends of seams. This is template plastic, sold at quilt shops for this purpose. I love the stuff.
I like to sew along a drawn line, so I usually mark my patches a quarter-inch in from the cut edge. When I have many templates to mark, I make a window template like the one to the left in the photo. I had traced the sewing line on this template and then cut out the inside portion AND the line. I tested it to make sure my pencil mark when I trace the sewing line will be exactly where it should be. It is tricky getting this window just right, but when there are many patches to mark, it is a real timesaver.
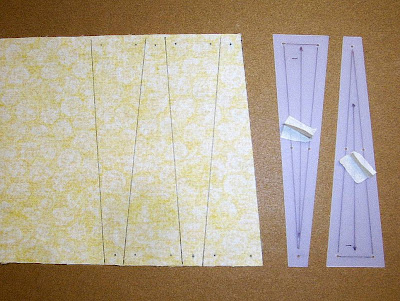
The next photo illustrates my method for cutting triangle patches. It is quick! First I cut a strip that is the width of the template's length. This strip is cut cross-grain so the patches will end up with the lengthwise fabric grain aligned with the arrow on the template (to keep those long, skinny pieces from stretching out of shape.) If I have many patches to cut, I'll make two identical templates, as you see below, so I can leapfrog them across the fabric. Here's how that works: After I trace around the first template, I butt the second one up against it, rule along it with my pencil, then hold THAT one in place and move the first one to the next position, etc. Using this method I only need to trace one line for each patch. I mark the dots at the same time. (In the photo I used a dark marker so the lines would show for purposes of illustration. I usually mark much more lightly.

See the masking tape tabs? They are little handles I can grab to quickly reposition the templates. The bent ends of the window template serve the same purpose.
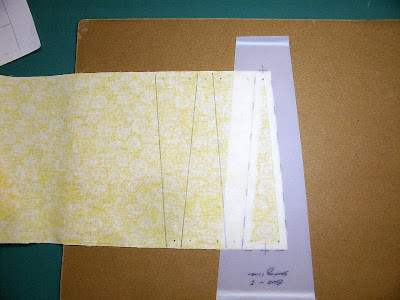
Below you can see the window template in action. I align it with the dots I have marked. For efficiency, I do every-other patch all along the strip, then I turn the template around and do the remainder. I need 32 of this particular patch, so these little efficiencies really speed up the process.

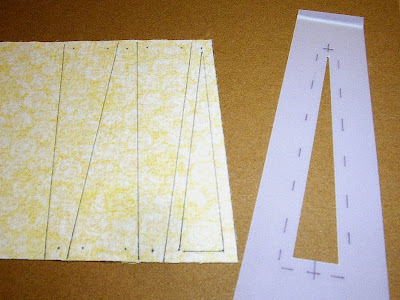
Above, the window template is aligned for tracing. Below, the line has been traced and the template removed.

You might think this is a lot of work, but once the templates are made, the tracing is very quick. I don't cut these patches apart with a rotary cutter but sit in my comfortable chair with a little pair of scissors and cut along the lines.

No comments:
Post a Comment